Thursday, December 15, 2011
The Vintage Owl
I've been busy with starting up my own little business for crocheting etc.... its called the vintage owl on Facebook!! stop on by and take a peek at the fun stuff I've been making! www.facebook.com/thevintageowl2011
Sunday, June 12, 2011
Crispy Salted Chocolate Chip Oatmeal Cookies!
Crispy Salted Oatmeal Chocolate Cookies!!
note: anything italicized are my notes, variations and tips!
The original recipe has chocolate in it, but I used white chocolate and it really works wonderfully in here. Even if you’re a dark chocolate fan. Watch out, use the good stuff and this may even convert you. (I couldnt find a white chocolate bar, at yokes in deer park, which is why I used semi sweet chips instead)

1 cup all-purpose flour
3/4 teaspoon baking powder
1/2 teaspoon baking soda
1/4 teaspoon table salt
14 tablespoons (1 3/4 sticks) unsalted butter, slightly softened
1 cup sugar
1/4 cup packed light brown sugar
1 large egg
1 teaspoon vanilla extract
2 1/2 cups old-fashioned rolled oats
6 ounces good-quality White or (Dark, Milk or Semi sweet.)chocolate bar, chopped (not “white chocolate” chips; they’re almost always artificial. I am adamant about this.) (I used semi Sweet chips that I coarsely chopped)
1/2 teapoon flaky sea salt (like Maldon or fleur de sel) (for sprinkling on top) (I used spanish sea salt)
1. Preheat oven to 350 degrees. Line baking sheet with parchment paper or Silpat. Whisk flour, baking powder, baking soda, and table salt in a medium bowl.
2. Beat butter and sugars until light and fluffy. Scrape down bowl with rubber spatula, then add egg and vanilla and beat until incorporated.

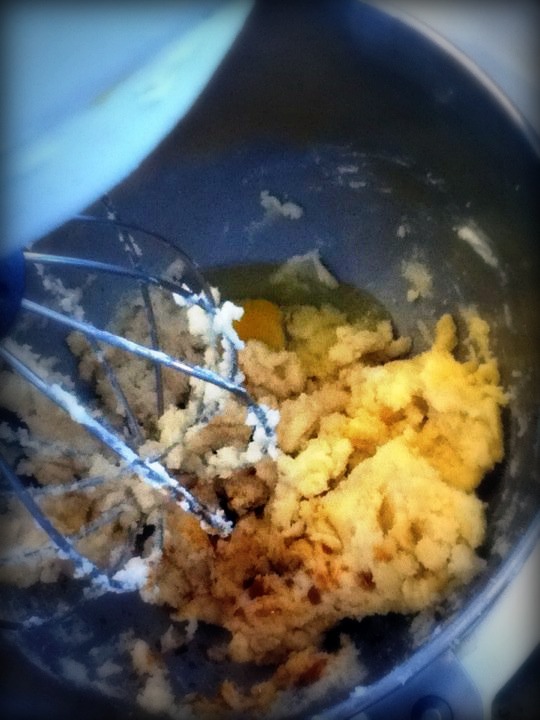
Scrape down bowl again. Add flour mixture gradually and mix until just incorporated and smooth. Gradually add oats and chocolate and mix until well incorporated.

3. Divide dough into 24 equal portions, each about 2 tablespoons. Roll between palms into balls, then place on lined baking sheets about 2 1/2 inches apart. Using fingertips, gently press down each ball to about 3/4-inch thickness.

4. Sprinkle a flake or two of sea salt on each cookie
5. Bake until cookies are deep golden brown, about 13 to 16(I only did 10 minutes in my propane oven) minutes, rotating baking sheet halfway through. Transfer baking sheet to wire rack to cool.


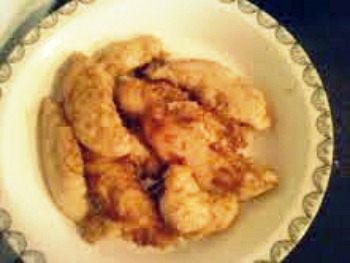
Amazingness!!! new favorite recipe!
Thursday, June 9, 2011
Short ribs, veggies and a Barley salad

short ribs in the dutch oven being seared.

veggies are ready to be tossed in the dutch oven

Sauteing them up... my crazy sis in law...... those smelled soooo good

Meat is added to the veggies. lid back on. into the oven for about 2 hours....

Barley, Strawberries, Walnuts, and Feta, tossed in a mint dressing.... it was divine!
sorry I dont really have a recipe. We just made thes following a basic short rib recipe, from The Joy of cooking. They were just sprinkled with salt and pepper and we seared them all the way around. Veggies were just sauted in the fat from the ribs. And the Salad was sort of following a recipe.
Monday, April 4, 2011
Chicken Piccata
So yesterday my sister in law and I got together and cooked. We made the most delicious meal I've had in a long time. Chicken Piccata is a lemony, tangy, buttery, salty dish that is to die for. We went with the traditional Italian recipe from Giada De Laurentiis
Ingredients:
2 skinless and boneless chicken breasts, butterflied and then cut in half
Sea salt and freshly ground black pepper
2 cups all purpose flour, for dredging
6 tablespoons unsalted butter
5 tablespoons extra-virgin olive oil
1/3 cup fresh lemon juice
1/2 cup chicken stock
1/4 cup brined capers, rinsed
1/3 cup fresh parsley, chopped
Directions
Season chicken with salt and pepper. Dredge chicken in flour and shake off excess.
 In a large 10 or 12-inch skillet over medium high heat, 2 tablespoons of butter with 3 tablespoons olive oil. When butter and oil start to sizzle, add 2 pieces of chicken and cook for 3 minutes. When chicken is browned, flip and cook other side for 3 minutes. Remove and transfer to plate. Melt 2 more tablespoons butter and add another 2 tablespoons olive oil. When butter and oil start to sizzle, add the other 2 pieces of chicken and brown both sides in same manner. Remove pan from heat and add chicken to the plate


Reduce heat to medium low and add the lemon juice, stock and capers. Return to stove and bring to boil, scraping up brown bits from the pan for extra flavor. Check for seasoning. Return all the chicken to the pan and simmer for 5 minutes. Remove chicken to platter. Add remaining 2 tablespoons butter to sauce and whisk vigorously. Pour sauce over chicken and garnish with parsley.

Ingredients:
2 skinless and boneless chicken breasts, butterflied and then cut in half
Sea salt and freshly ground black pepper
2 cups all purpose flour, for dredging
6 tablespoons unsalted butter
5 tablespoons extra-virgin olive oil
1/3 cup fresh lemon juice
1/2 cup chicken stock
1/4 cup brined capers, rinsed
1/3 cup fresh parsley, chopped
Directions
Season chicken with salt and pepper. Dredge chicken in flour and shake off excess.

Reduce heat to medium low and add the lemon juice, stock and capers. Return to stove and bring to boil, scraping up brown bits from the pan for extra flavor. Check for seasoning. Return all the chicken to the pan and simmer for 5 minutes. Remove chicken to platter. Add remaining 2 tablespoons butter to sauce and whisk vigorously. Pour sauce over chicken and garnish with parsley.

We served ours with roasted baby red potatoes with rosemary and thyme, steamed broccoli and a glass of Shiraz. For dessert, shortcake with blackberries and raspberries and topped with homemade whipped cream with cinnamon and nutmeg. Sadly I forgot to take a picture of the final plate of all the food, because it was so yummy and I was starving! lol
Thursday, March 31, 2011
1920's, 30's. 40's Yo Yo Trims
So I've been reading through this book, from some local ladies fondly known as the The Farm Chicks. In their book, they have tons of ideas for recipes and kitchy cute crafts. These yo yo trims are one of them. I wanted to make them to adorn headbands and purses. enjoy!!


Collect the pieces you need for the project.
Material, buttons, thread, needle, pencil, scissors & something round to draw a circle with. I choose a headband and my purse to attach the yo-yo trims to.

Draw a circle onto material and cut around leaving a 1/4 inch seam allowance.
Fold the circle in on the lines you drew and iron to hold in place. Sew around the circle with a running stitch. Do not cut thread.

Gather the stitches and gently pull til a pouch forms. Stitch down around the gathers so that the yo-yo lays flat. Thread on a button and stitch into place.

Arent they cute?!?!

To attach to my purse, I sew safety pins onto the back and then pinned them on, that way I can take them off, or change them up if I want something different.

I sewed these onto this headband

Loving the yo-yo trims!!
Au Revoir my dearies!
Wednesday, March 9, 2011
Beauty Secrets of the Bible. Day 2
Day 2: Acknowledging the Wound
~... He made us accepted in the Beloved.- Ephesians 1:6
This meditation for day two talks about wounds. Every woman, who is afraid to call herself beautiful, has been wounded. we avoid beauty, because we are protecting ourselves from pain and hurt and rejection. We believe the lie that we are not good enough or pretty enough, so we'll never be accepted. Beauty is supposed to hurt, but not in the way we think. It hurts because we have to face the fears and rejections, like pouring salt into that wound we've received that we have fought so hard to close. But deep down inside is a little girl, who just wants to be told she's beautiful. So Ginger gives us a little help. Luke 18:16 says, "Let the little children come to Me, and do not forbid them; for such is the kingdom of God." She encourages us to take that little girl on the inside to Jesus and let him show us who we are beautiful to Him, and ask Him to show her love and beauty and the God who will always call her beautiful.
Q; Ask God to heal my wounds.
A: I grew up surrounded by sisters. And each and everyone of them is beautiful. But sisters, we all know can be mean. And I had my fair share of the teasing comments, as I'm sure I too teased them. I am built very differently then my sisters. So when I began the changes into womanhood, I remember the teasing comments from my sisters, telling me I was fat, because I had a shape to my body, because I had hips. That I was ugly because my nose was long and narrow. And so I constantly compared myself to them. They are all thin with dark hair, some are tall and slender and some are short and thin. And here is me, the blond with the hourglass body shape and funny nose, the one they refer to as the chubby one. I spent day after day, wishing I could be skinnier,or that my nose would be different. Its trying to go through life comparing yourself to others and wishing you could look different. After graduating high school and moving away from home and then coming back I started hanging out with girls and we'd go out to the bars and whatnot and I get men telling me that I'm sexy, but they don't realize, that I don't want to be sexy. I want to be told I'm beautiful. Sexy is overrated and an overused term. I want to be seen as a beautiful woman. These are my wounds. It hurts to talk about them here, in the open where all can see, but even as writing these words here, I know I'm giving this wound to God, and I know He will help the little girl inside, who just wants to be beautiful, to find that beauty in Him.
~ In Jesus I'm healed and unconditionally accepted.
Along with the 28 days of cleansing, I have also started a new face cleansing that is an ancient biblical regime.(Sorry my mary kay lady! trying something different for a month!)
My morning and evening face cleansing.
Step 1: wash and exfoliate
Rich Milk wash.
1 cup powered milk( Ginger likes Meyenberg goat milk, I use just powered milk. look for something that has fat in it)
1 cup quick cooking oats.
blend together in a food processor until very fine. When using it to wash, take a small amount of mixture, like a teaspoon or so, add enough water to make a paste (i just do this in my hand) and scrub your face with it. Rinse and pat dry.
Step 2: nourish and plump.
Honey Tonic
Apply 1-2 drops of honey to wet finger tips and massage into wet face. Do not rinse. Pat dry.
Step 3: Moisturize and protect.
Olive oil moisturizer.
Place 2-3 drops of extra virgin olive oil onto your palm. rub palms together and pat your face gently( i massage mine into my face.)
After only doing these steps last night and this morning, I can already feel and see a difference. My dry skin that I have been trying to get to go away on my face has disappeared and it feels softer and the honey tonic makes your skin glow. its weird I know, but it honest to goodness glows. My face looked like I had put on a highlighter and blush after I had washed it. After putting on my makeup, the glow still peaks through!!

Sunday, January 2, 2011


Subscribe to:
Posts (Atom)